Setting up a smart thermostat can quickly upgrade your home’s comfort and energy savings, but not every house has the wiring these devices need. If your thermostat wiring is missing the “C wire” (common wire), don’t worry. You can still install most smart thermostats without a C wire by using a power adapter or repurposing an existing wire.
By learning a few tricks and gathering the right tools, you’ll be ready to tackle the process step by step. Whether you want to make use of an unused wire, use your system’s G wire, or install a special adapter, there’s a clear solution that works for your situation.
Key Takeaways
- Installing a smart thermostat without a C wire is possible with simple methods.
- Several options exist, including using an adapter or converting another wire.
- Careful preparation and testing will help your new thermostat work well.
Understanding Smart Thermostat Wiring Without a C Wire
Installing a smart thermostat without a C wire means you need to understand how wiring works and what your options are for powering the device. Knowing the purpose of the C wire, your current wiring setup, and possible solutions will help you move forward safely and effectively.
What Is a C Wire and Why Is It Needed?
A C wire, or common wire, is an extra wire that delivers constant power from your HVAC system to your thermostat. Unlike the other wires, it provides a steady stream of 24V power.
Smart thermostats need this stable power source because they often have Wi-Fi and display features that use more energy than basic models. Without a C wire, some smart thermostats may not work correctly or may lose settings. In older homes, the thermostat may get power from batteries or by stealing power from other wires. This can sometimes cause problems with the HVAC system.
Common Wiring Configurations in HVAC Systems
Thermostat wiring can differ depending on your HVAC setup and the age of your system. Most standard HVAC systems use the following wires:
| Wire | Color | Function |
|---|---|---|
| R | Red | Power (Heating/Cooling) |
| W | White | Heat |
| Y | Yellow | Air Conditioning |
| G | Green | Fan |
| C | Blue/Black | Common (C wire) |
Not all homes have a C wire installed, especially older ones. You might only see R, W, Y, and G wires. Some newer systems have extra wires, making it easier to add a smart thermostat.
Identifying Existing Wires and Potential Alternatives
To find out what wires you have, turn off your HVAC system and remove your current thermostat cover. You’ll see terminal labels like R, W, Y, G, and sometimes C. These wires each control different parts of your HVAC system.
If there’s no C wire, you might have unused wires behind the wall that can be converted to a C wire. Some smart thermostats let you use the G wire as a C wire, but this can affect fan control.
Power adapters or C-wire kits are also available to provide the necessary power without running new wires. These adapters connect directly to your HVAC control board and provide a safe power source for your smart thermostat. Always check your system’s compatibility before making changes.
Preparing for Smart Thermostat Installation
Before starting, you need the right tools, a safe workspace, and a clear understanding of your current wiring setup. Careful preparation makes the installation process smoother and helps avoid problems with your HVAC system or electrical work.
Tools and Materials Needed
Gather all tools and materials before you begin. Common tools include:
- Phillips and flathead screwdrivers
- A small level
- Needle-nose pliers
- Wire stripper/cutter
You will also need new mounting screws, wall anchors, and possibly a small drill if your wall is tough. Many smart thermostats come with a wall plate, which helps cover holes from your old thermostat.
Have your new smart thermostat ready, along with its user manual. For homes without a C wire, you may need a power extender kit or an adapter like the Venstar Add-a-Wire. A voltage detector is recommended to check if power is off before touching wires.
Ensuring Safety by Shutting Off Power
Safety is critical any time you are doing electrical work. Shut off power to your HVAC system at the circuit breaker. Label the breaker switch to prevent someone from turning it back on while you work.
Once power is off, confirm by trying to turn on your heating or cooling system from your old thermostat. If nothing happens, it’s safe to continue. Never skip this step, as working with live wires is dangerous.
If you are unsure which breaker controls your system, turn off the main breaker for your home. Only restore power when the installation is complete and the thermostat is ready for testing.
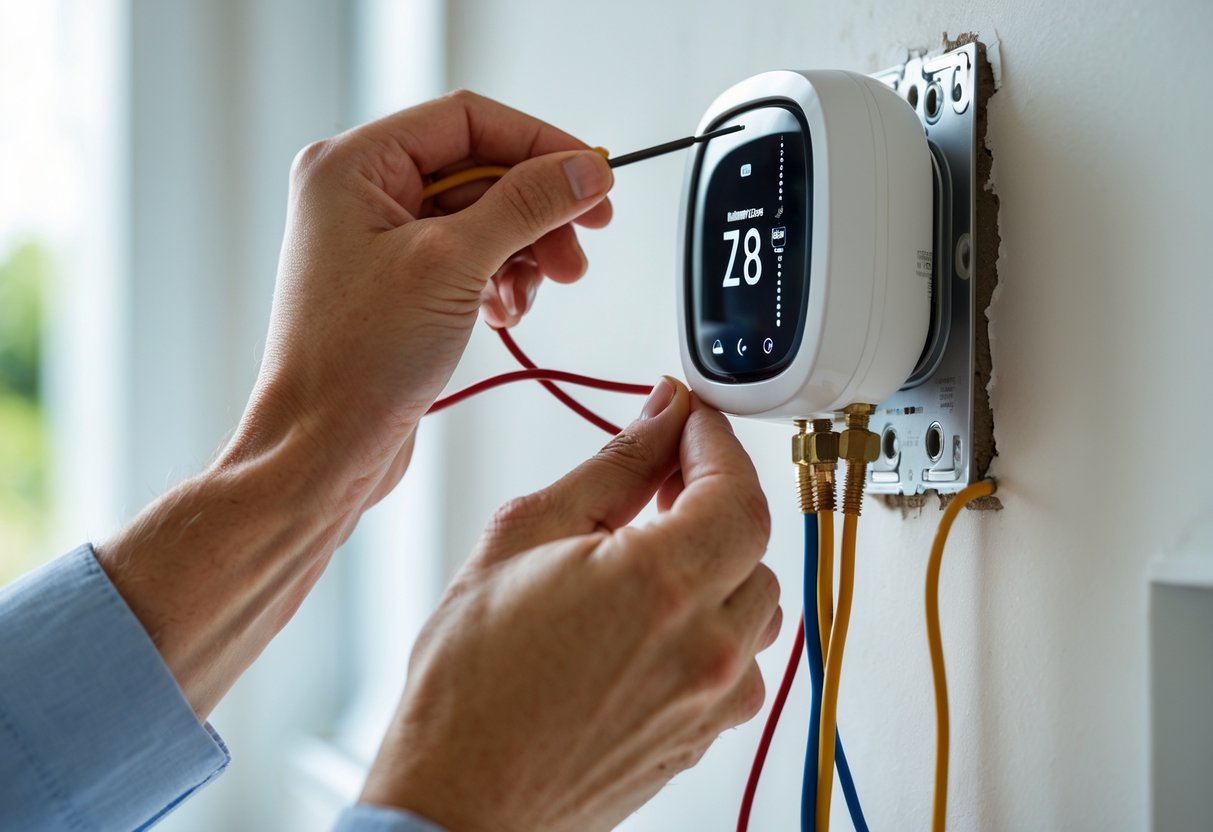
Testing Power and Labeling Wires
After removing the cover of your old thermostat, use a voltage detector to ensure none of the wires have electrical current. Double-check, especially if your home has multiple HVAC zones.
Take a clear, close-up photo of the current wiring layout. You’ll need this reference during installation. Use the thermostat’s terminal labels (such as R, W, Y, G) to label each wire with provided stickers or small pieces of tape.
Careful labeling prevents confusion when connecting wires to your new smart thermostat. This step is especially important if you plan to use an adapter or power extender kit to compensate for the missing C wire. Proper identification of wires helps avoid mistakes and protects your HVAC system.
Installation Methods for Smart Thermostats Without a C Wire
There are several ways to install a smart thermostat if you do not have a C wire. Each method has its own pros, cons, and requirements for tools or wiring changes.
Using a C-Wire Adapter or Power Extender Kit
A C-wire adapter, sometimes called a Power Extender Kit, can give power to your new smart thermostat even if you don’t have a C wire. Popular kits are available for thermostats like Nest and ecobee.
You connect the adapter’s wires at your HVAC control board and at your thermostat location. This lets your system provide a constant power source. Most kits come with clear instructions and only basic tools are needed. Check if your thermostat model provides its own adapter.
Installation steps usually include:
- Turning off power to the HVAC system.
- Opening the furnace panel and wiring the adapter to the board.
- Labeling and connecting adapter wires at your thermostat.
- Turning the power back on and testing the system.
A C-wire adapter is a safe and reliable choice for most homes.
Leveraging an Unused Wire as a Common Wire
If you find an unused wire in your thermostat cable bundle—often a blue wire—you may be able to turn it into a C wire. This is a simple and cost-effective solution if extra wires run from your furnace to your thermostat.
Steps include:
- Turning off power before removing the thermostat cover.
- Identifying and confirming an unused wire at the thermostat and the HVAC control board.
- Connecting the wire terminal to “C” on both the thermostat base and the furnace board.
- Securing all wires and restoring power.
Note: Not all homes have unused wires available. Always check both ends before proceeding.
Replacing G Wire With a C Wire Option
Some systems let you use the green (G) wire, originally for the fan, as a C wire. This method can work, but you may lose independent fan control from your thermostat.
How it works:
- Disconnect the G wire from its original location at both ends.
- Reconnect the G wire to the C terminal at the furnace and thermostat.
- Only the fan will run when heating or cooling is on.
For some smart thermostats like Nest or ecobee, this can be a quick fix. Just remember, you must give up the use of your fan’s “on” or “auto” modes when the system isn’t heating or cooling.
Selecting Battery-Powered or Low-Power Smart Thermostats
Some smart thermostats are built to run on batteries or use very little power, so they don’t need a C wire at all. These units include models from Nest and ecobee that are listed as “battery-powered” or “low-power.”
Features:
- Battery-powered smart thermostats often run for months before batteries need changing.
- Some units use power-stealing, drawing enough from other wires.
- Not all features (like Wi-Fi or display) work the same as C-wire-powered models.
Battery or low-power options are easiest for renters or those not wanting to change wiring, but you may lose smart features or need to check battery life often. Always double-check what options your chosen thermostat supports.
Optimizing Performance and Troubleshooting After Installation
After installing a smart thermostat without a C wire, you need to check if your device receives steady power, connects to Wi-Fi, and can be controlled remotely. Proper setup helps lower energy bills and makes sure your smart thermostat works well in your home.
Verifying Continuous Power and System Operation
Start by checking if your thermostat turns on and stays powered without interruption. If you used a power extender kit or adapter, make sure it’s connected securely and the wires are tight.
Check the status display to see if your new thermostat can control your heating and cooling system. Test by raising or lowering the temperature a few degrees and listening for your HVAC system to respond.
If your system cycles off or the screen goes blank, there may be a wiring problem. Double-check the wire connections to each terminal according to your thermostat’s instructions.
Keep an eye on your device for a few hours to ensure continuous power. Some thermostats offer a battery symbol or a warning if they’re not getting enough power.
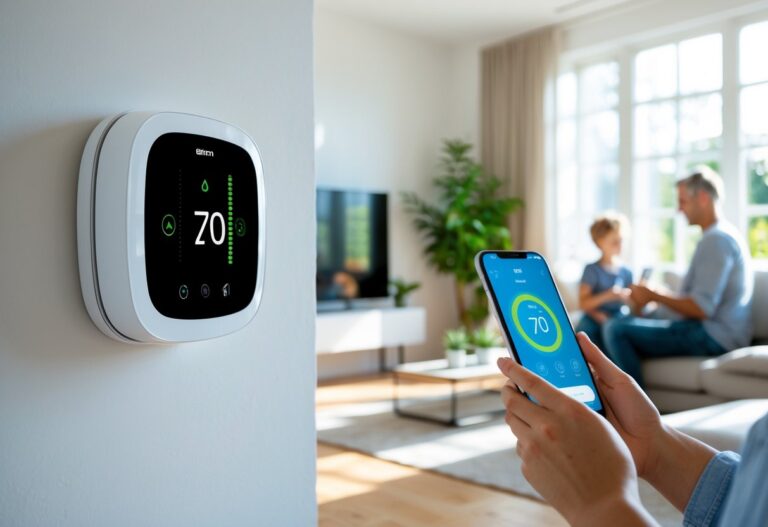
Ensuring Wi-Fi Connectivity and Remote Access
A strong Wi-Fi connection lets you control your thermostat from a smartphone, tablet, or smart home assistant. Open the app recommended by your thermostat’s brand and follow the steps to join your home’s Wi-Fi network.
Check your Wi-Fi signal strength at the thermostat’s location. If your signal is weak, move your router closer or use a Wi-Fi range extender.
Once connected, test remote access by changing the temperature using your phone and confirming the thermostat responds.
Enable any app notifications about system status or temperature alerts. This helps you see if your device disconnects or loses Wi-Fi.
Maximizing Energy Savings and Efficiency
Smart thermostats can help save energy and lower your bills with proper setup. Set up schedules in the app so your system only runs when it’s needed. For example, lower the heat or cooling when nobody is home.
Turn on features like “smart home” or “eco mode.” These use sensors or your phone’s location to adjust the temperature automatically.
Review the energy usage reports within your thermostat’s app each week. Look for trends and adjust your schedules or setpoints if you notice higher-than-expected use.
Sealing gaps around windows, using fans, and keeping doors closed between rooms can enhance energy efficiency too.
Troubleshooting Common Installation Issues
If your thermostat will not power on, inspect all wiring connections and make sure your HVAC system’s circuit breaker is on. Compare your wiring setup to the photo you took before installation.
When your heating or cooling will not turn on, make sure all wire terminals are fully inserted and secure. Some systems need a short delay after installing a new thermostat before starting up.
If you see error messages, check your thermostat’s user manual or app for codes and guide steps. Most apps provide simple troubleshooting tools you can use.
For Wi-Fi or app problems, restart your router and your thermostat. If issues continue, contact the thermostat’s support for solutions.